Let start with the example.

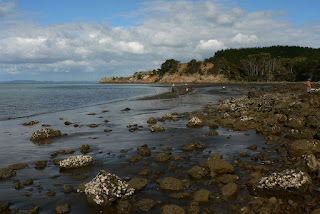
I took this photo at South Head, the Kaipara Harbour entrance, not far from Auckland, New Zealand. In order to preserve the sky I set up exposure compensation to -2/3, so the whole picture became too dark. The sand is dark indeed, as it contains black volcanic ash, but pieces of broken sandstone on the foreground should be same colour like the background cliff.
One disadvantage of the script is that it takes a while to process a picture and there is no preview available, so nobody can tell you what values should be set as the parameters (four ones in total). Thus the idea of the explained technique is to over-process the picture, then to reduce the effect to get the desired result. So I opened the picture in GIMP, clicked Filters - Enchance - Advanced Tone Mapping and set the parameters as follows:
- Gauss. Blur: 10% - the default value
- Opacity of blurred layer - 100 or near
- Opacity of merged layer - 100 or near
- Copies of merged layer - 3

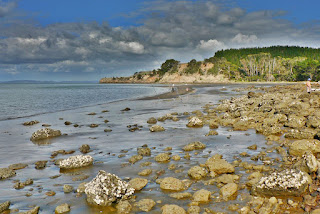
I definitely got what I wanted, but the result is far from ideal. The colours are un-real, and halos are strong and clearly visible. This new image appeared as a second layer above the original image, and this is very handy, as what I have to do now is just to change some parameters of this new layer.
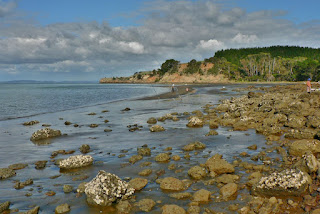
So I switched to the Channels, Paths, Undo, Layers - ... dialog and selected Layers tab. The new layer is called tmapd: with some numbers, it should be already selected. I changed the layer mode to Value (the last in the list) and adjusted its opacity until I considered the result as satisfactory; the final opacity value for this image was about 60%. This is the interactive process and the changes are reflected on the image (almost :) immediately.

As you can see the clouds became more impressive, the background is now brighter; there is still some halo above the forest, but it is not so obvious.
This technique increases the noise level, especially in brighter parts of the image. This is because they contain less information, higher local contrast means small variations of brightness becomes more visible; it usually affects the blue sky. One can try to improve this by applying another plugin - GREYCstoration to the resulting and flattened image.